Creating a Website with Namecheap Domain and Hostinger Hosting: A Step-by-Step Guide

In this video, we discussed about how to connect a Namecheap Domain Name With Hostinger?
1. Purchasing Domain and Hosting
- Namecheap offers affordable domain registration, while Hostinger provides budget-friendly hosting services.
2. Setting Up the Website
- Log in to both Namecheap and Hostinger dashboards.
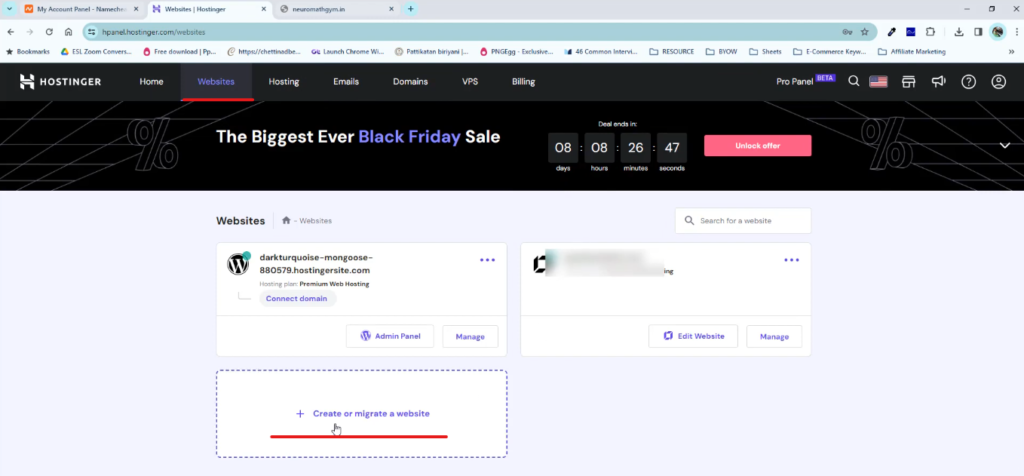
- In Hostinger dashboard, navigate to Websites > Create or Migrate a Website > Create a New Website.
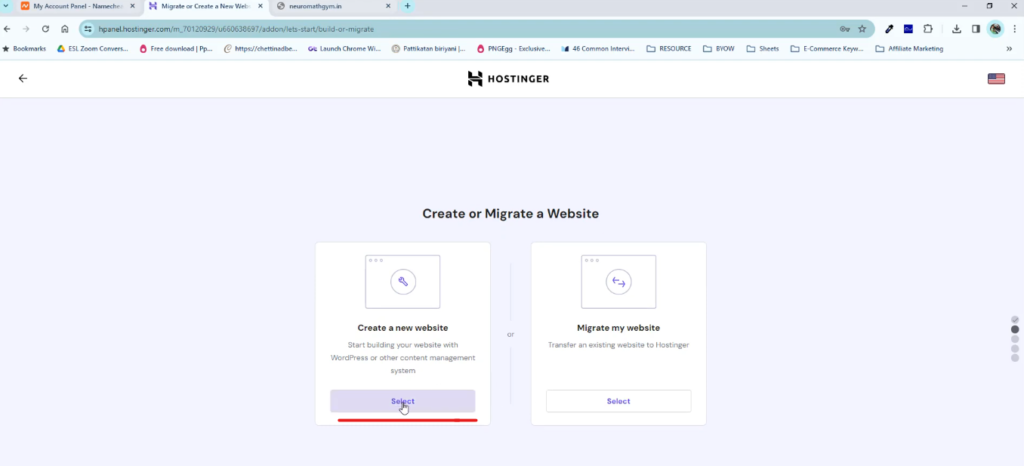
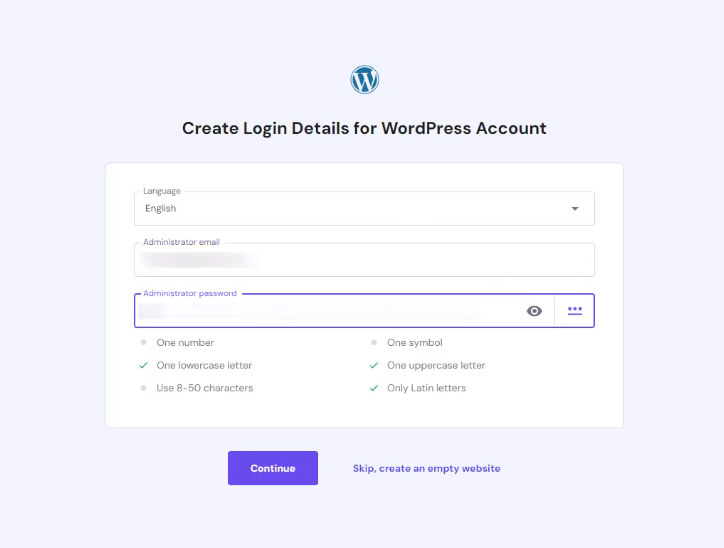
- Choose WordPress and set an admin username and password.
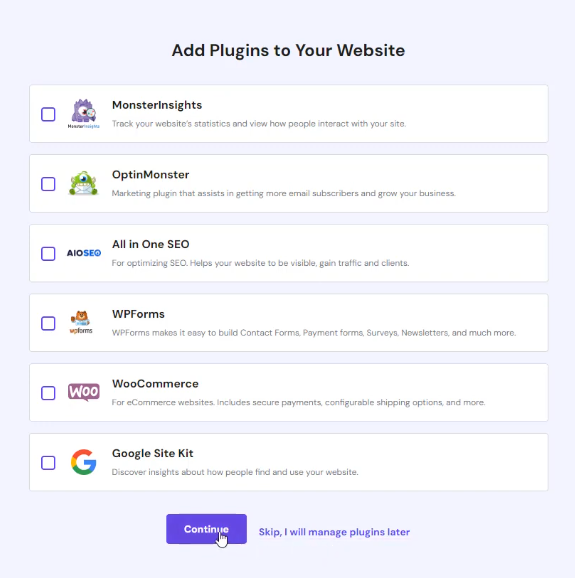
- Skip recommended plugins and proceed.
3. Integrating Domain and Hosting
- Select “Use an Existing Domain” and enter the domain name from Namecheap.
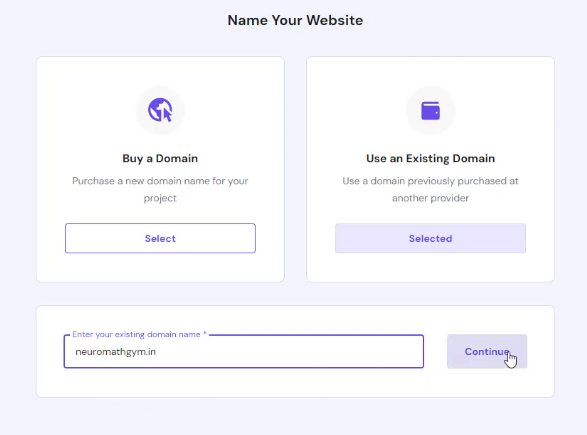
- Proceed to the domain and hosting integration step.
- Copy the DNS numbers provided by Hostinger.
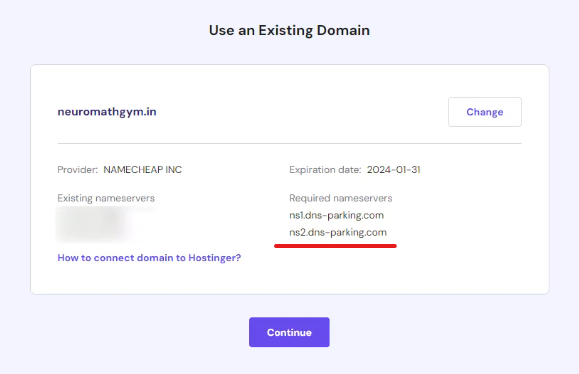
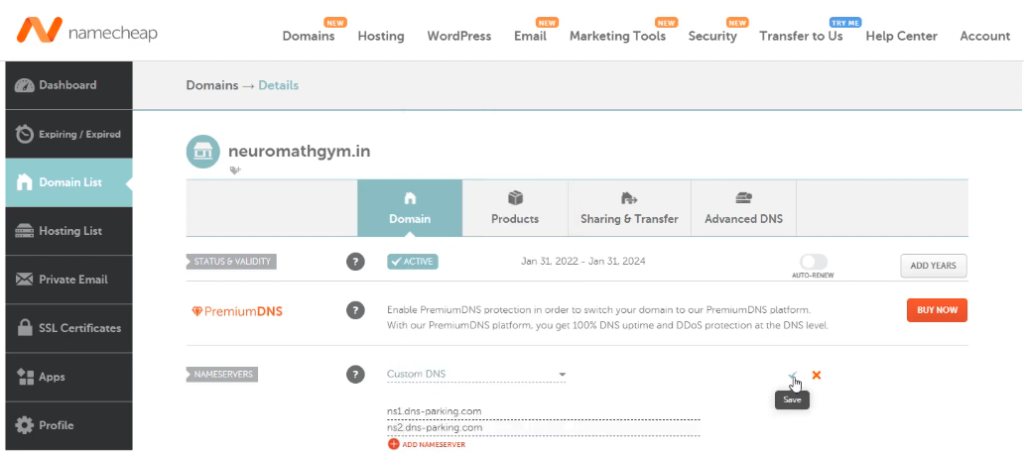
- In Namecheap dashboard, manage the domain and select “Custom DNS” from the dropdown.
- Paste the Hostinger DNS numbers and save. Note: It may take up to 48 hours for changes to reflect, but you can continue with website creation without waiting.
4. Website Creation and Customization
- Continue in the Hostinger dashboard.
- Edit the WordPress website before integration by accessing the WordPress dashboard.
- Uninstall unnecessary plugins and themes.
- Install and activate the Astra theme, known for its simplicity and beginner-friendliness.
- Use Elementor page builder and choose a template. Some are free, while others are premium. For example, selecting the “Earth” theme.
- Proceed with building your website.

5. Checking Domain Integration
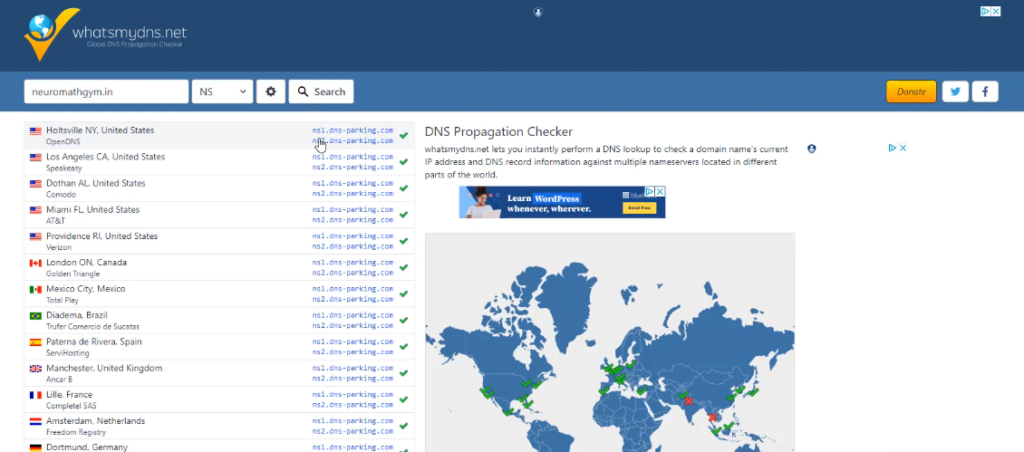
- Use the link https://www.whatsmydns.net/ to verify domain integration.
- Type the domain name and choose NS (Name Server).
- Search to see if the chosen DNS numbers are reflected. If so, the domain is successfully integrated with Hostinger.
By following these steps, you can create a website using a Namecheap domain and Hostinger hosting, ensuring a seamless integration process and a professional online presence.
Please find the video for the above tutorial here:


0 Comments